An AI skin texture and lighting guide
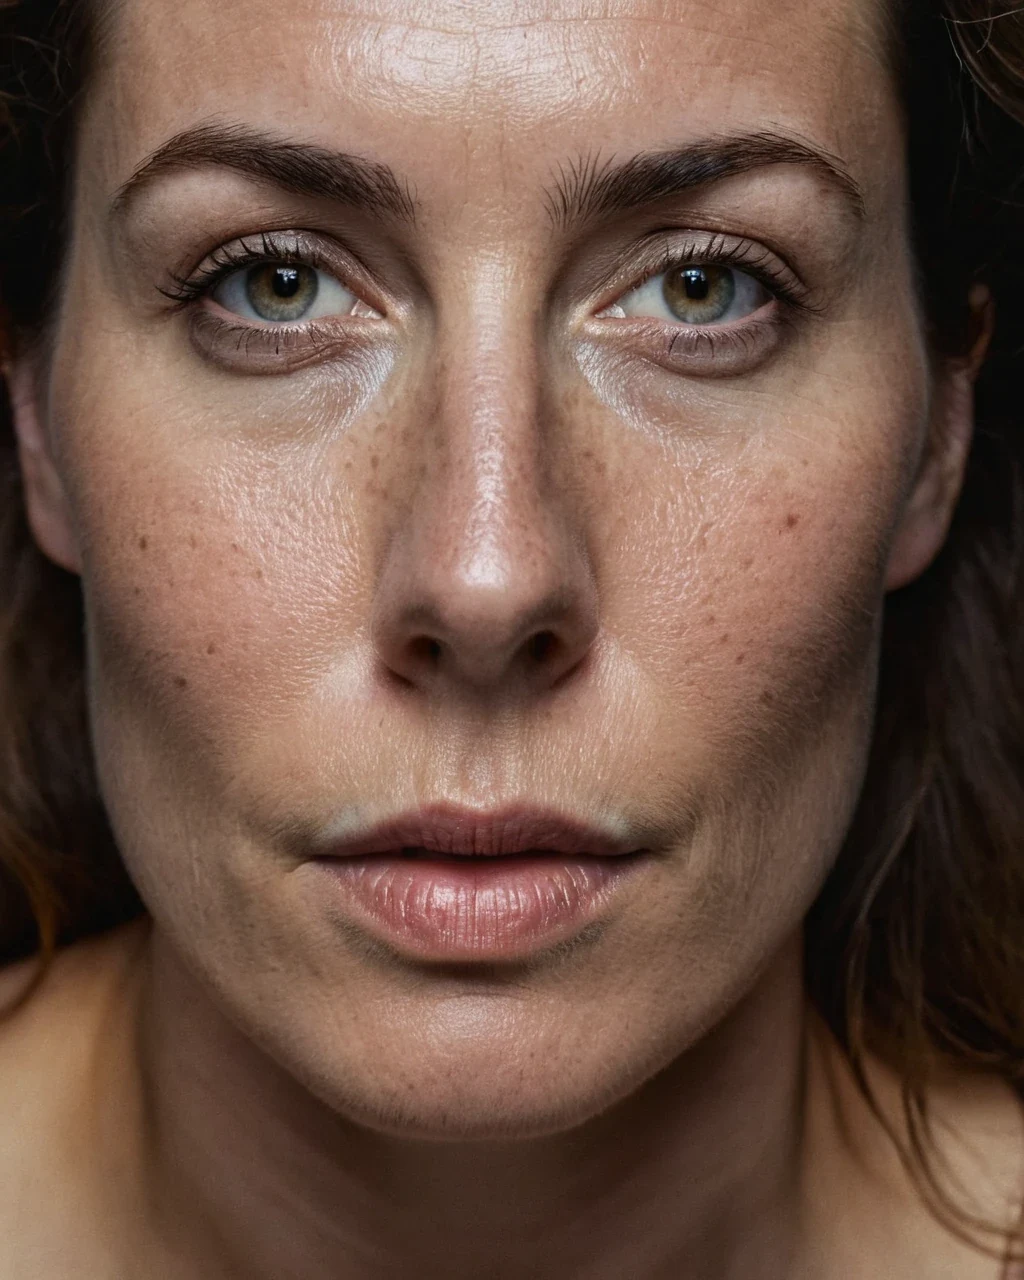
Plastic skin is rarely one bad word. It comes from a chain of choices: Beauty-only adjectives, frontal flat light, no micro-texture, excessive denoising, and sharpening after the fact. A believable synthetic adult needs pores, fine hair, subtle color variation, and directional light that explains the surface. Build a first draft in the studio, then test one change at a time. Small tests show what each word does.
Describe micro-texture
Ask for visible pores, fine vellus hair, faint lines, and natural variation without turning the prompt into a defect list.
- Keep detail age-appropriate.
- Use restrained retouching.
- Avoid contradictory porcelain-skin language.
Choose source size
Large sources create broad transitions; small sources reveal texture and shape.
Window or softbox
Natural commercial finish.
Hard key
Editorial structure and visible texture.
Clamshell
Beauty polish that still needs pore retention.
Finish at delivery size
Judge skin at the actual crop and resolution. Upscale after composition, face, and expression are final, then inspect halos and waxy patches.
Texture is not even across a body
A single grain over the whole frame is the clearest sign of a synthetic surface. Real skin changes character every few centimetres.
Forehead and nose
The largest visible pores and the most oil. This is where a render smooths first, so it is where you check first.
Cheeks
Finer pores, more colour variation, faint capillaries near the surface. Flatten this and the face turns to plastic.
Neck and chest
Softer texture, visible tendons under thin skin, and often a slightly different tone from the face.
Hands and knuckles
Coarse, creased, and the single hardest area for any checkpoint. If the hands hold up, the render probably does; exclusions help here.
| Area | Failure to look for |
|---|---|
| Forehead | Wax finish, no pores at all |
| Hairline | Fine hair painted as a solid edge |
| Cheek | Uniform grain, no colour variation |
| Knuckles | Melted or fused joints |
| Nail edges | Smeared, missing, or doubled |
Wet, oiled and matte skin behave differently
Each finish is a different lighting problem, and asking for one while lighting for another is what produces the shiny plastic look.
Matte
Diffuse and even. Needs texture words to stay interesting, because there are no highlights doing the work.
Natural sheen
A small specular highlight on the forehead, nose and shoulders. This is what most stock briefs actually want.
Oiled
Long continuous highlights that follow the muscle. Requires a controlled key or it clips to white.
Wet
Broken highlights, visible droplets, and darker hair. Ask for droplets explicitly or you get a uniform gloss instead.
Upscale last, and check what it did
Upscaling invents detail. Run it after composition, face and expression are settled, then inspect the result rather than trusting it.
- Look for halos along the jaw, shoulders and hairline.
- Check that pores did not become a repeating pattern.
- Confirm fine hair survived rather than turning into a painted edge.
- Compare eyes and teeth against the pre-upscale frame at full size.
What to look at before you call skin finished
Run the production review checklist over the set before you publish. Then read the model review guide.
- Pore size varies across a face. An even grain is a texture overlay.
- Fine hair at the hairline and jaw survives export.
- Bright spots sit where the light is.
An AI skin texture and lighting guide: common questions
Why does AI skin look waxy?
Flat light, excessive smoothing, missing micro-texture, or over-upscaling.
Should I add more sharpness?
Usually not; first restore believable light and texture.
Which model starts naturally?
ImageFap AI V1 is the default starting point for natural photographic detail.
Why does the forehead go plastic first?
It is the broadest, flattest area of the face, so smoothing there costs the model the least detail. That makes it the most reliable place to spot the problem.
Should I ask for pores directly?
Yes, but pair it with restrained retouching. Asking for pores while also asking for flawless skin gives the model a contradiction to resolve on its own.
Does upscaling improve skin?
It improves resolution, not honesty. It can just as easily invent an even grain, so always compare against the original at full size.
Where to go next
This guide pairs with boudoir practice, beauty lighting and final upscaling.